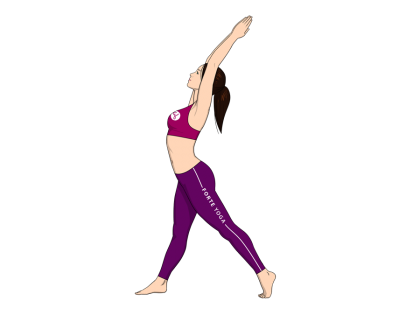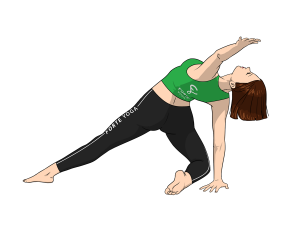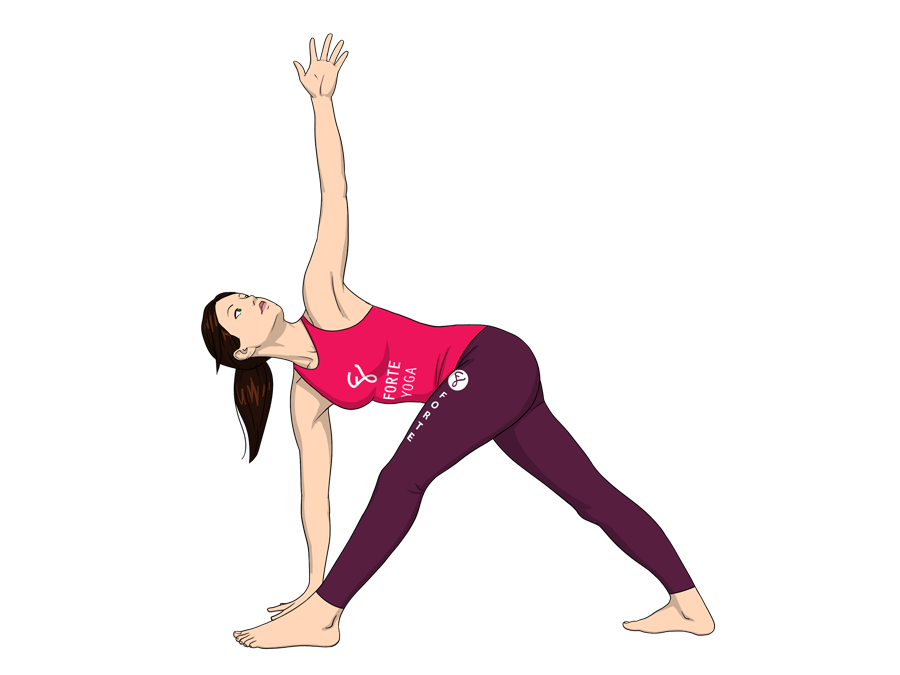
Revolved Triangle Yoga Pose is a standing pose that targets the hamstrings and shoulders and is ideal for yogis and yoginis at an intermediate level.
 manipura – the wisdom chakra
[yoga-sharrre]
- Start in the Mountain Pose (Tadasana). With an exhalation, step back using your left leg so that your feet are roughly 3-4 feet apart (or about one leg’s length).
- Adjust your front foot, in this case your right foot, to a 90 degree angle so that it’s facing forward. Turn your back foot to a 45 degree angle facing away from your body. Keeping your hips square, make sure your left and right heel are aligned.
- You may raise your arms parallel to the floor and reach out, palms facing down, or place your hands directly on your hip crease (the space between your hips and legs), elbows pointing out at the waist, if you are having trouble keeping your hips square. Lean your torso slightly forward, hips sliding back but remaining in the same position.
- With an exhalation, turn your torso to the right, pushing your left hip toward your right leg. Keep your left heel firmly grounded and your hips square.
- Exhaling again, revolve your body further to the right, this time leaning over your right (front) leg. Reach down with your left hand towards the floor, placing your palm down on either the inside or outside of the foot. If you are unable to reach the floor, place a block on either side of the foot and press your palm on that instead. If you started with your hands out at your sides, your right arm should move up and end with your fingers pointed at the ceiling, completely parallel with your left arm.
- Keeping your left arm straight with your hand firmly planted on the floor or block, you may need to turn slightly further to the right to open up your right shoulder. If you started with your hands on your hips, you may choose to reach up toward the ceiling with your right arm if you feel balanced enough. Turn your face so that you are looking up at your right thumb if you’re comfortable, or face forward or down if you feel neck strain.
- Focusing on the area between your shoulder blades, push your arms away from your torso and place the majority of your weight on your front hand and your back heel.
- Hold this position for 30-60 seconds, breathing rhythmically, keeping your heels grounded and hips square. Exhale, bringing down the right arm and releasing the twist. Inhale as you move your body back up to the standing position. Revert back to the Mountain Pose and repeat with the other leg.
- Breathe deeply through each step.
- If you have a back or spinal injury, only perform this if you have a trainer or a partner present. Consult a healthcare professional before deciding if this position is safe for you specifically.
- Avoid this pose if you are experiencing migraines, diarrhea, headaches, insomnia, low blood pressure or depression.
- If you have high blood pressure, vertigo or are prone to dizzy spells, do not look up at the ceiling or down at the floor; just face forward.
- If you used a prop (such as a block) getting into your stance, use it when moving out of the stance as well to avoid pain or injury.
If you experience tightness in your hamstring, support your hip or shin of your front leg with your opposite hand while leaning forward. This will help you deepen your pose and reach toward the ground without compromising your position. Apply pressure on your shin with your hand while pushing your shin into your hand as well, providing support and balance. Once you’ve deepened your stance, you may then place your hand on the ground.
This is a great stretch for runners with tight hamstrings and tight hips.
All Muscles: Hamstrings, calves, quads, ankles, abs, hips, lower back, shoulders, groins
Target Muscles: Hamstrings, calves, shoulders
- Aids in digestion.
- Reduces lower back and neck pain.
- Tones pelvic organs.

